Walking Time Austria

This custom tool calculates the length, the elevation gain and loss, the maximum slope and the walking time of a route drawn into the map in Austria. The calculation is done by the free web service "Wegzeitberechnung" of geoland.at, based on the laser scan elevation models of the federal states. The walking time follows DIN 33466 (Alpine Club), the method of the Swiss Alpine Club (SAC) or VIIA; the marching time adds 5 minutes of break per 30 minutes of walking.
Every finished line is added as a part of the route, shown in the map with its number and calculated at once. Further lines extend the route. Parts can be removed one by one, Reset clears the route. Under Options the users choose the Calculation method, can Reverse walking direction, Check self-intersection and choose the Basemap in the report; a changed option recalculates.
The result shows walking time and marching time out, back and out and back, the length (2D and 3D), elevation gain and loss, height difference, minimum and maximum elevation and the maximum slope, with several parts also the walking time per part. Open report shows the page of the service with overview, map and elevation profile in a new window, PDF downloads the same report as a PDF file.
|
More information about the web service can be found here. |

|
The tool is available in WebOffice core and WebOffice flex and shows the same form in both. In other clients it shows a note that it is not available in this WebOffice client. The language of the form (German or English) follows the language of the client. |

|
The service accepts the coordinate systems EPSG 4326, 31254 to 31259, 31287, 3857, 25832, 25833, 32632 and 32633. The Esri codes 102100, 102113 and 900913 (Web Mercator) are passed as 3857. In projects with another map projection the tool reports that the projection is not supported by the service; it does not reproject coordinates. |
|
The service only connects consecutive parts if the gap between them is at most 20 m. This limit is fixed in the service. The tool checks the gaps before sending and names the part and the distance if a gap is larger. The users then remove the part or draw it closer to the end of the previous one. |
|
The print contains the map services of the project and the users' drawing objects, but not the graphics of the tool. The button Add to print adds the parts as lines and a one-line text with the walking time out and back and the length as drawing objects. The button is only shown if the Markup tool is available for the users in the project. The added objects can be edited or deleted there; adding the route again replaces them. |
|
The custom tool is an example delivered with WebOffice and does not grant any right to use the service. The operator of the custom tool clarifies the terms of use of the geoland.at service (geoland.at/site/geoservices.html) for its own deployment. The service may be throttled or changed without notice. |
|
The browser of the users calls the service directly. The IP address of the users and the coordinates are transmitted to the operator of the service (Rechenraum GmbH), WebOffice session or user data are not. Check data protection together with the terms of use before productive use. |
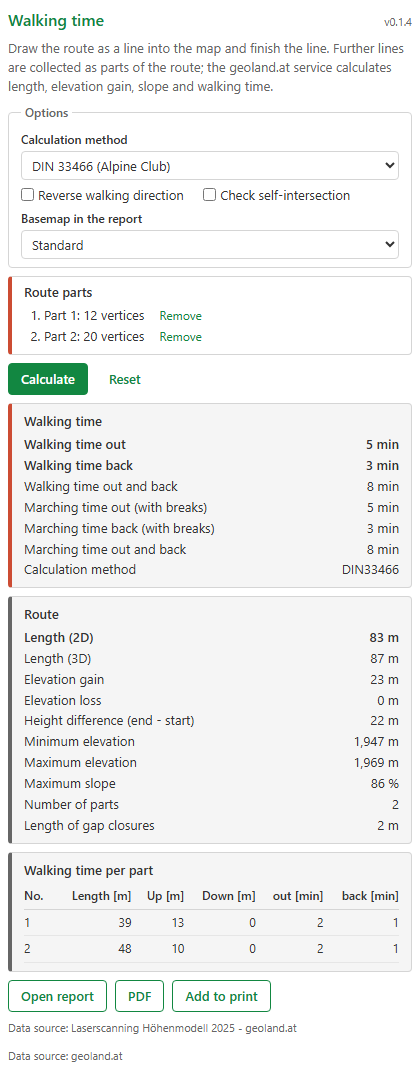
Tool form with options, two parts and result
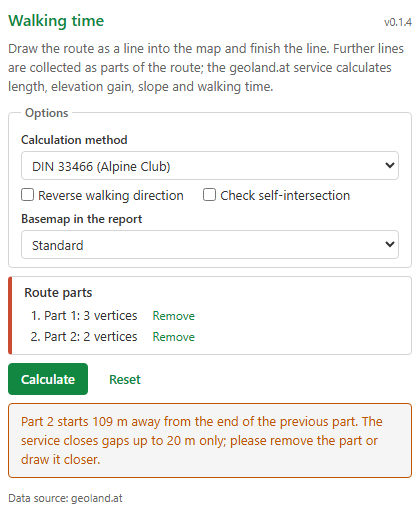
Note on a gap of more than 20 m between two parts
To be able to use this function, configure the custom tool tool_form.htm from the directory C:\Tomcat\webapps\<WebOffice application>\pub\custom_tools\WegzeitServiceAT, which is delivered by default with WebOffice 10.9 R5, as follows:
(1) Web Integration - Custom Tool
Configure a custom tool from the Web integration group with the following parameters:
Parameter |
Settings |
|---|---|
URL of external page |
pub/custom_tools/WegzeitServiceAT/tool_form.htm |
JavaScript function |
callFromWO |
Tool icon |
pub/custom_tools/WegzeitServiceAT/tool_icon.png |
Tool icon (flex) |
pub/custom_tools/WegzeitServiceAT/tool_icon_flex.png |
Visible in Client? |
Desktop and Flex |
|
WebOffice flex only shows the Tool icon (flex). Without this entry the tool has no symbol there. |
(2) Simple Custom Tool
Then, configure a Simple Custom Tool, set the parameter Tool mode to Line and the Pass mode to JavaScript. No user context options are needed, the tool passes no user data to the service.
|
If a content security policy is set up in the application configuration (see Content Security Directives), add https://voibos.rechenraum.com to the directives connect-src and form-action. The tool queries the service directly from the browser and sends report and PDF requests through a form. Append the host to the existing value instead of replacing it, so that hosts of other tools stay in the list. |
Further settings, e.g. whether every part is calculated at once (autoCalculate), the default calculation method and basemap or the limits of 20 parts and 3,000 vertices, are set in the admin part at the beginning of the script in the file tool_form.htm. The file readme.txt in the same directory describes them. As updates overwrite the delivered example files, copy the directory under a name of your own before you make changes.
|
For more details on configuring a custom tool, refer to the chapter Web Integration - Custom Tool. |