New Project |
  
|
New Project |
|
"New Project" is nearly identical with the Wizard "Create project" in WebOffice author standalone. To create a new project you have to enter the project name, the main map service, geometry service and output service as well as an overview map and a basemap.
For a quick overview on configuring a WebOffice 10.7 SP1 project in less than a minute, see the following video tutorial:
New Projet Wizard
Step 1: Type
Go to File -> New Project. In step 1 you have to decide whether a new WebOffice 10.7 SP1 project should be created from scratch or whether an existing Web Map from your Portal for ArcGIS should be used as the basis for the WebOffice 10.7 SP1 project configuration.

Wizard "New Project" - type
Note: The following steps describe the process of creating a WebOffice 10.7 SP1 project from scratch.
Step 2: Project ID
Enter the Project ID and the Project name. The WebOffice 10.7 SP1 project will be started in browser using the project ID as an URL parameter (e.g. project=Testproject). Be sure not to use any special character, german umlauts or spaces in the project ID. The project name will be displayed in the title bar of the WebOffice author and the browser. Optionally configure a user and a password to activate User Management light.
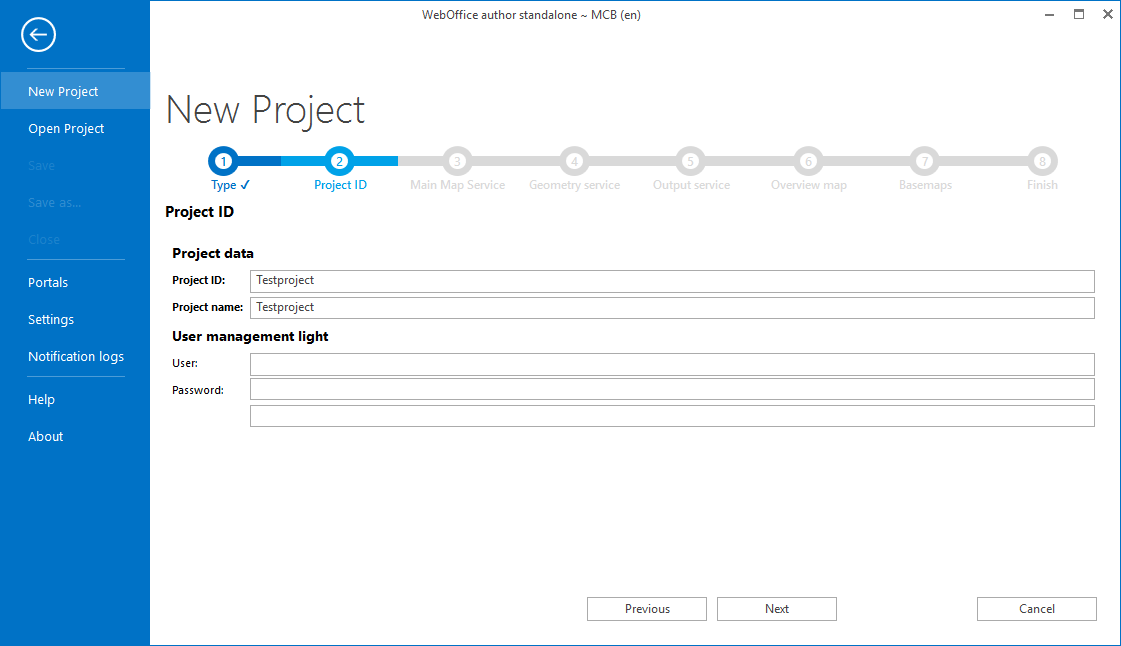
Wizard "New Project" - project settings
Click Next.
From here on, the wizards for "Create Project" and "Convert web map to project" differ.
Step 3: Main Map Service
Choose an already existing ArcGIS Server account (or create a new one). Enter the REST-URL of the map service you want to use as a main map service. You will find this on your ArcGIS Server Manager -> Services. Choose your Service and click on functions.
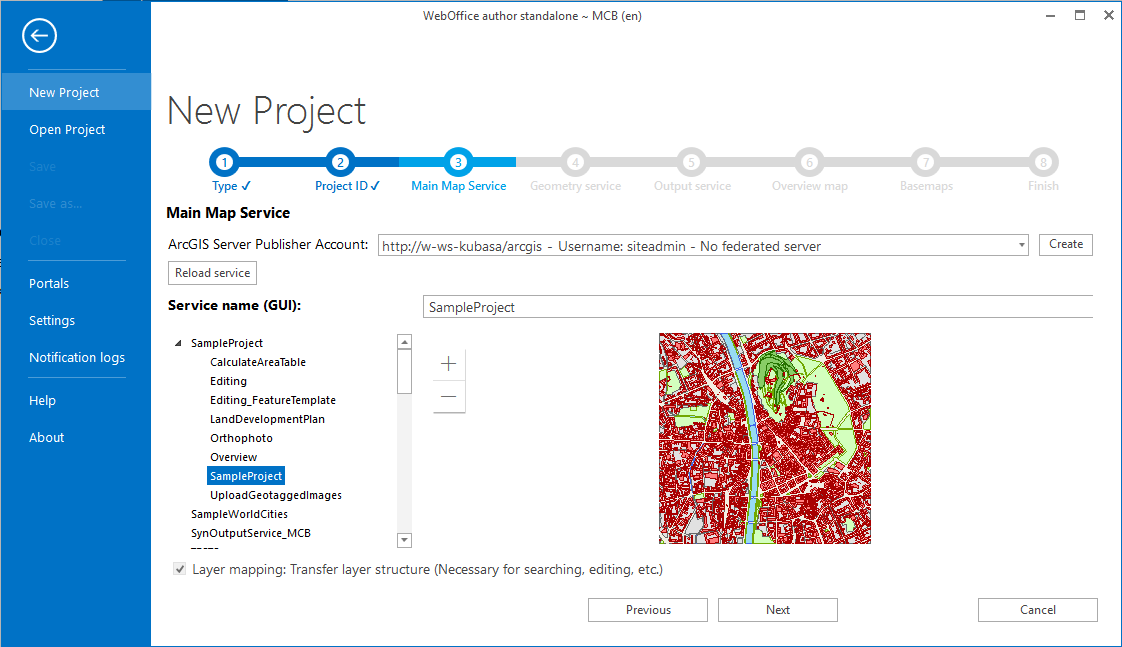
Wizard "New Project" - Main Map Service
Click Next.
Step 4: Geometry Service
Now it is necessary to add a geometry service to the WebOffice 10.7 SP1 project configuration.
The geometry service is create automatically with the installation of ArcGIS Server in the folder Utilities. Initially, this service is stopped. You can start it directly via ArcGIS Server. The default path is already used as the Service URL in this step.
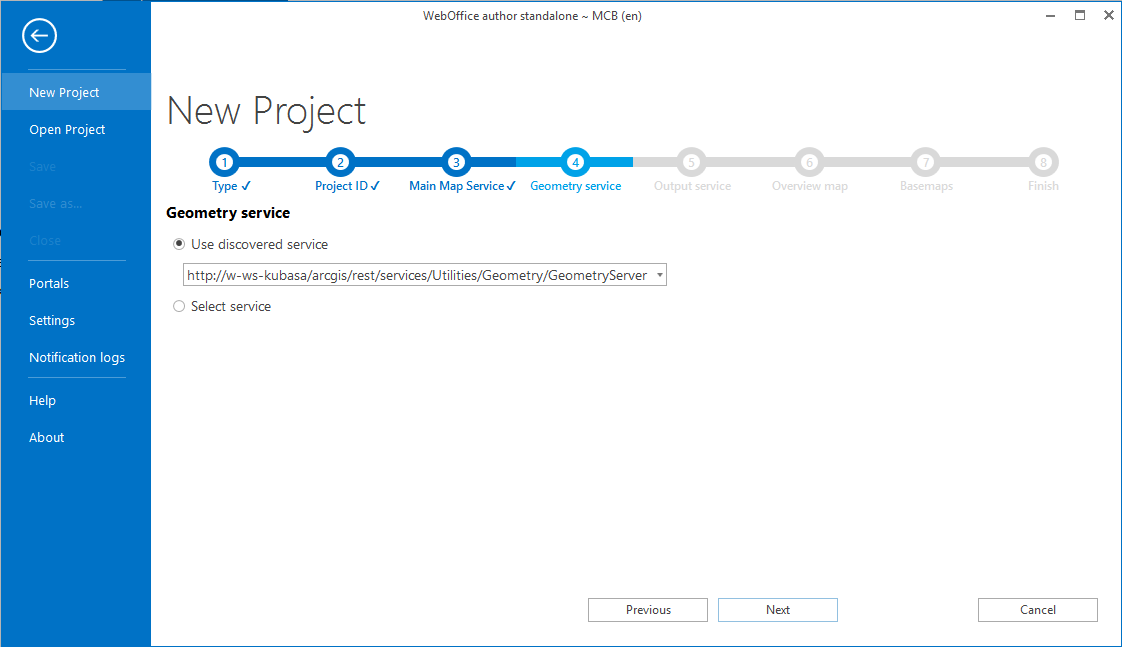
Wizard "New Project" - Geometry Service - Use discovered service
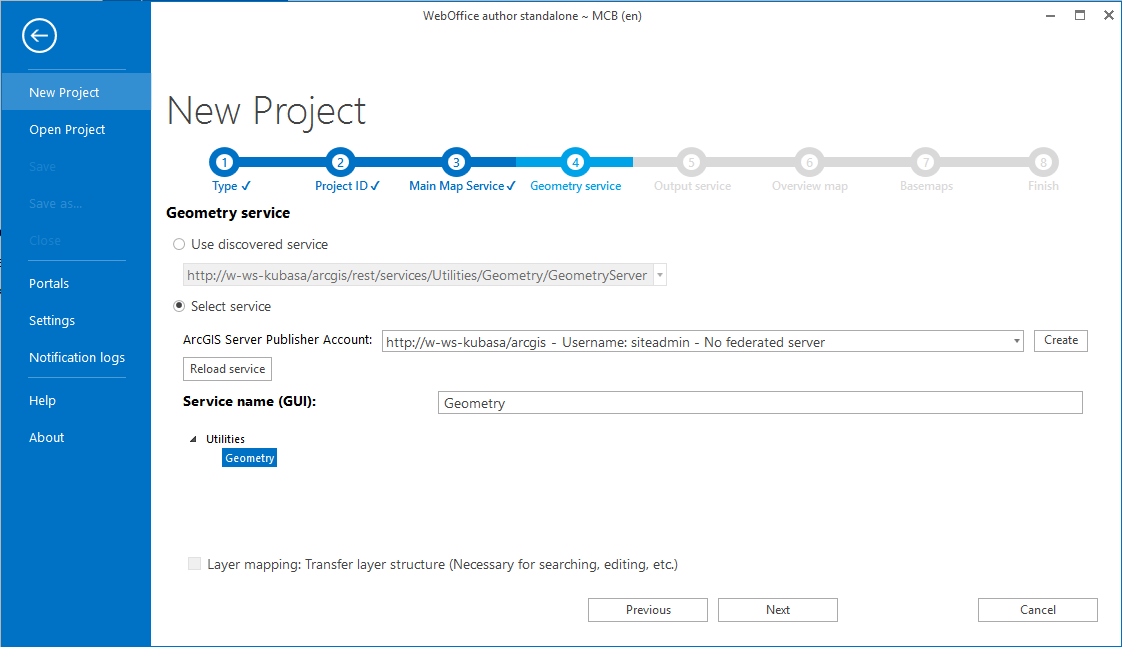
Wizard "New Project" - Geometry Service - Use discovered service - Select service
Click Next.
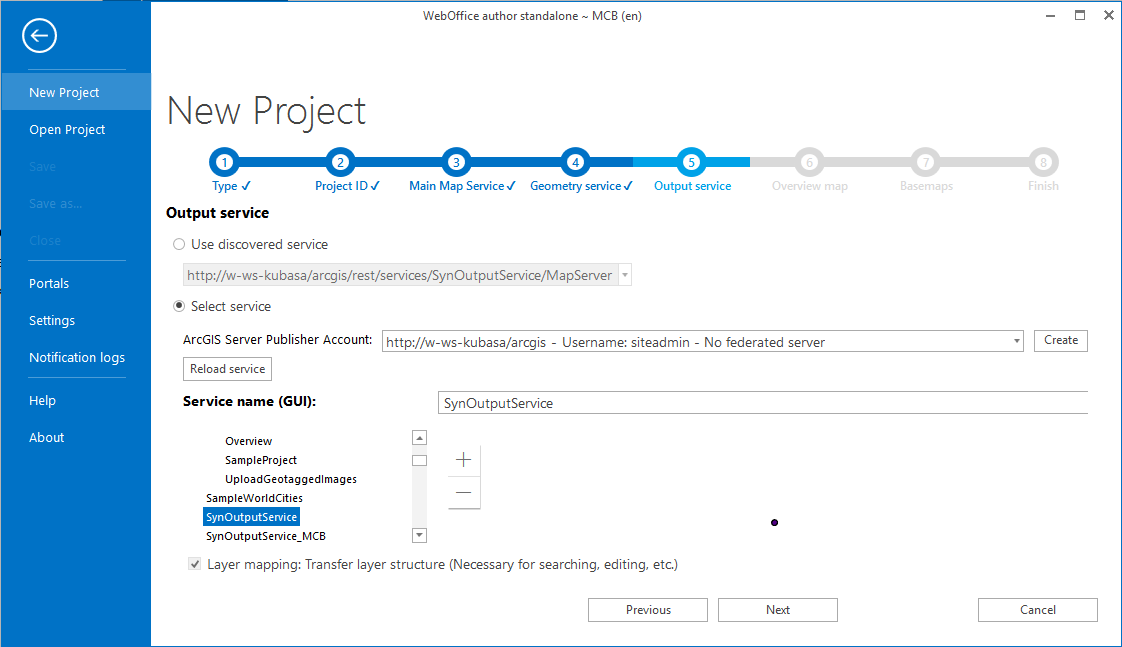
The URL to the Output Service can also be found using your ArcGIS Server Manager. The default path of the Output Service is also already used in the project wizard.
Note: Don't forget to check, if your Output Service has been started. More information on Publishing the SynOutputService.

Wizard "New Project" - User discovered output service
Wizard "New Project" - Output Service
Click Next.
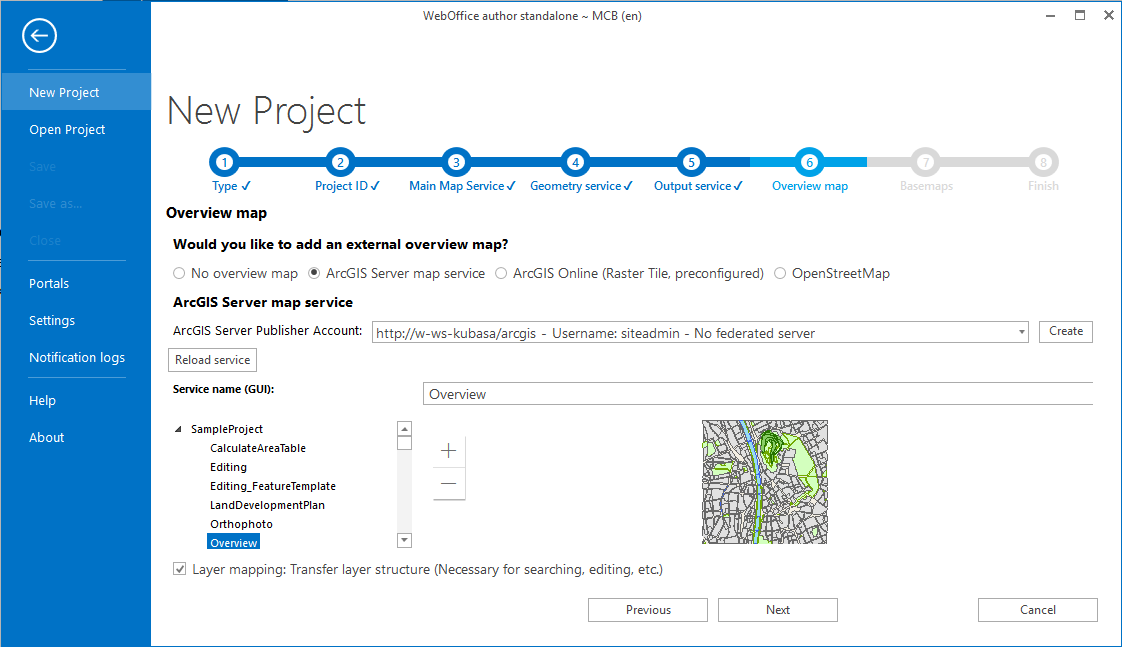
Step 6: Overview map
WebOffice 10.7 SP1 projects can be configured with overview maps. Please select an overview service type in this step:
•No Overview map
•ArcGIS Server Map Service
•ArcGIS Online (preconfigured)
•OpenStreetMap
Wizard "New Project" - Overview map
Click Next.
Note: If you have chosen "No overview map" or "OpenStreetMap" there will be no fields to configure. When choosing ArcGIS Server map service please select the ArcGIS Server Publisher Account and the Service URL. When choosing ArcGIS Online you have the choice between four layers World Topographic Map, World Street Map, World Light Gray Basemap and World Dark Gray Basemap.
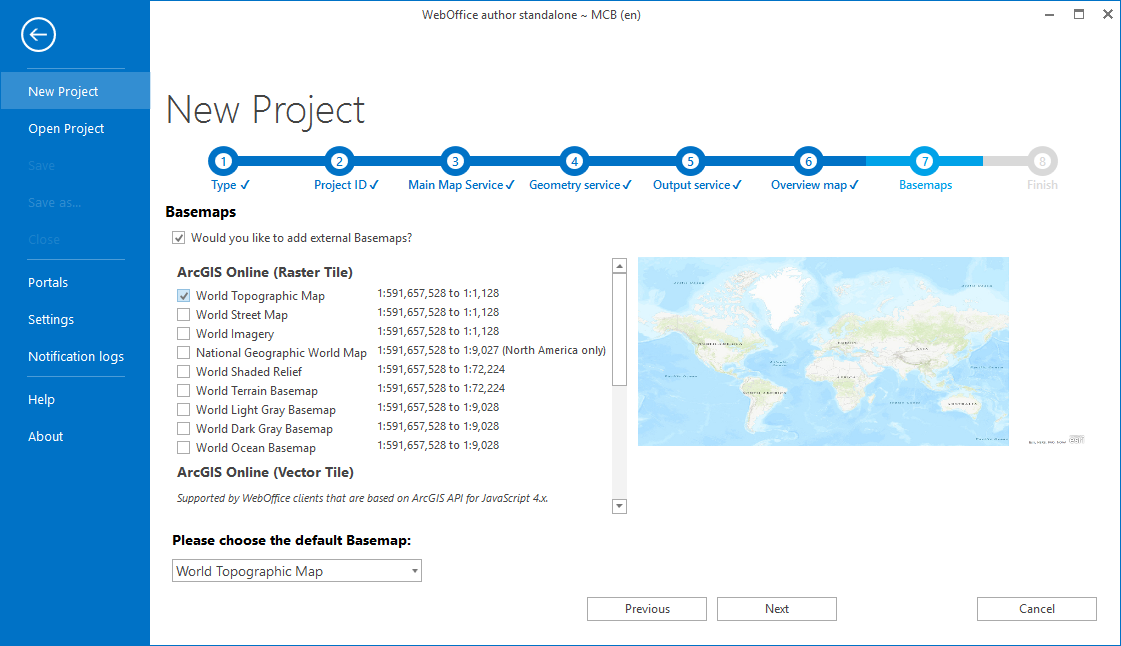
Decide whether you want to add an external basemap or not. You have the choice between several Basemaps from ArcGIS Online (Raster and Vector Tile), OpenStreetMap or Bing Maps. Please be aware that you need a token, when choosing Bing Maps. You can also select an empty Basemap. Please also choose your default Map View.
Note: WebOffice author needs a working internet connection to access external services.
Wizard "New Project" - Basemaps
Click Next.
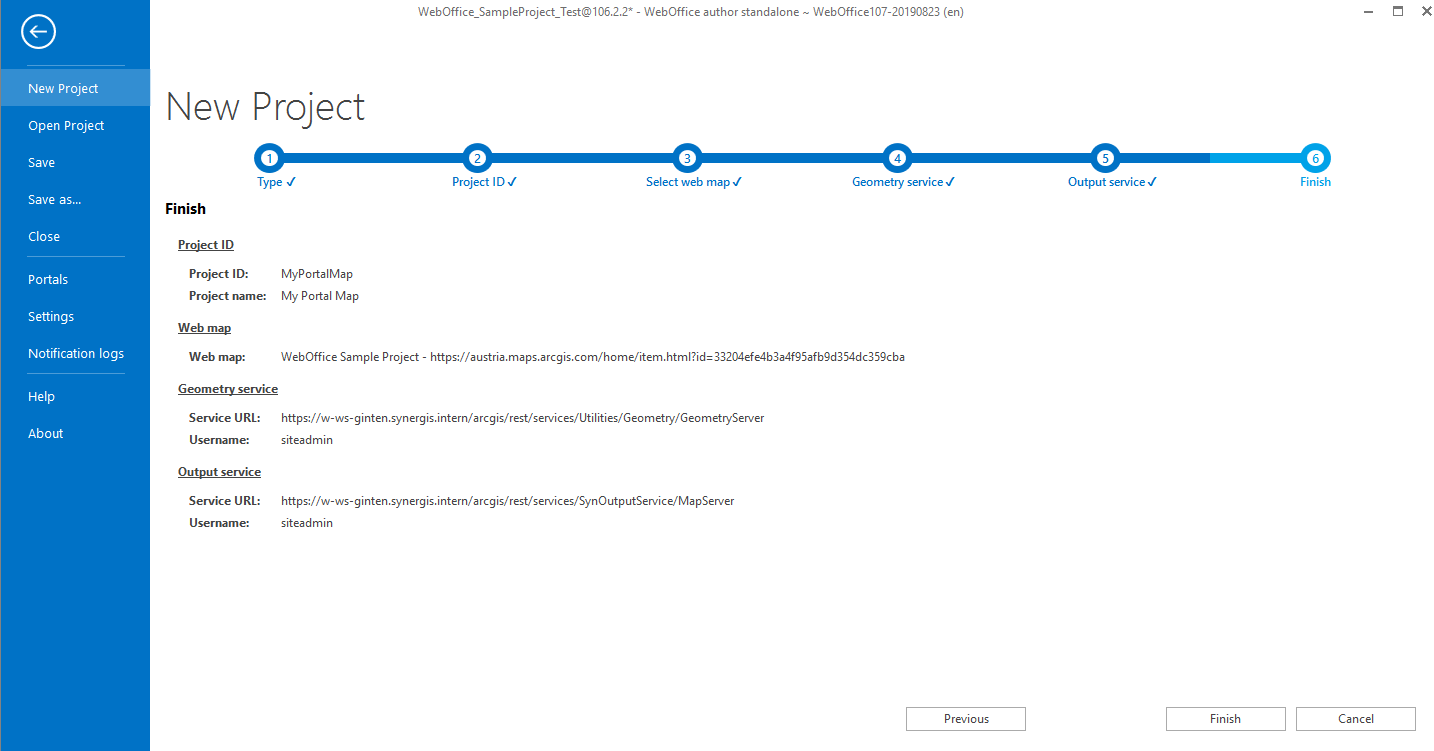
Step 8: Finish
WebOffice author standalone shows a summary of the project that will be created.
Click Finish in order to save the project configuration.
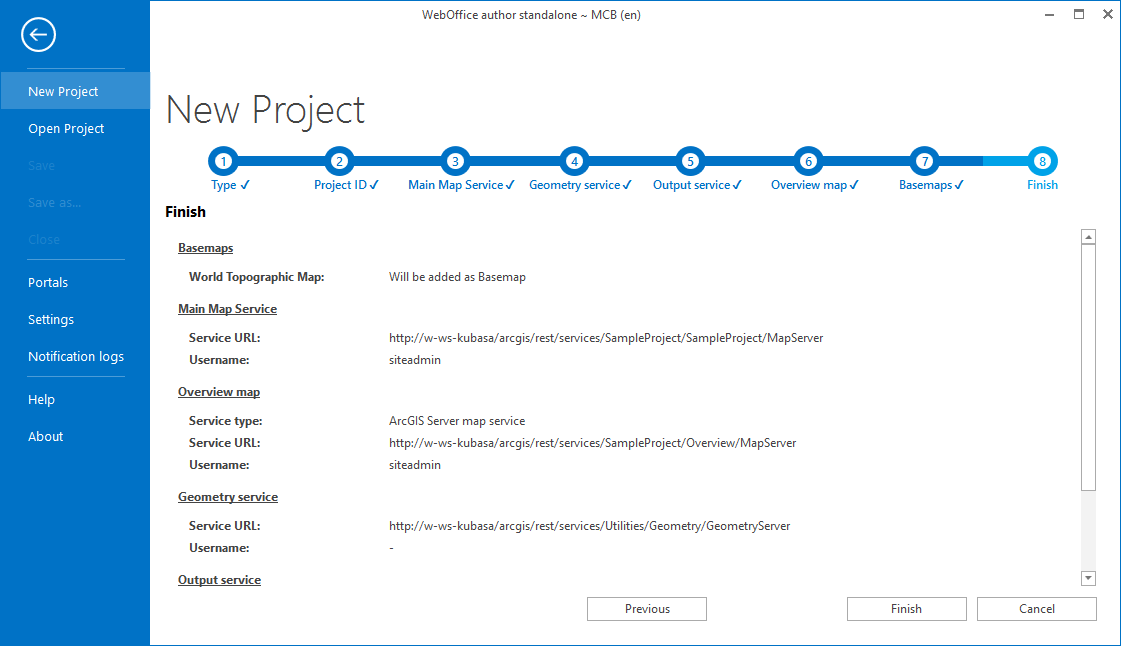
Wizard "New Project" - Finish
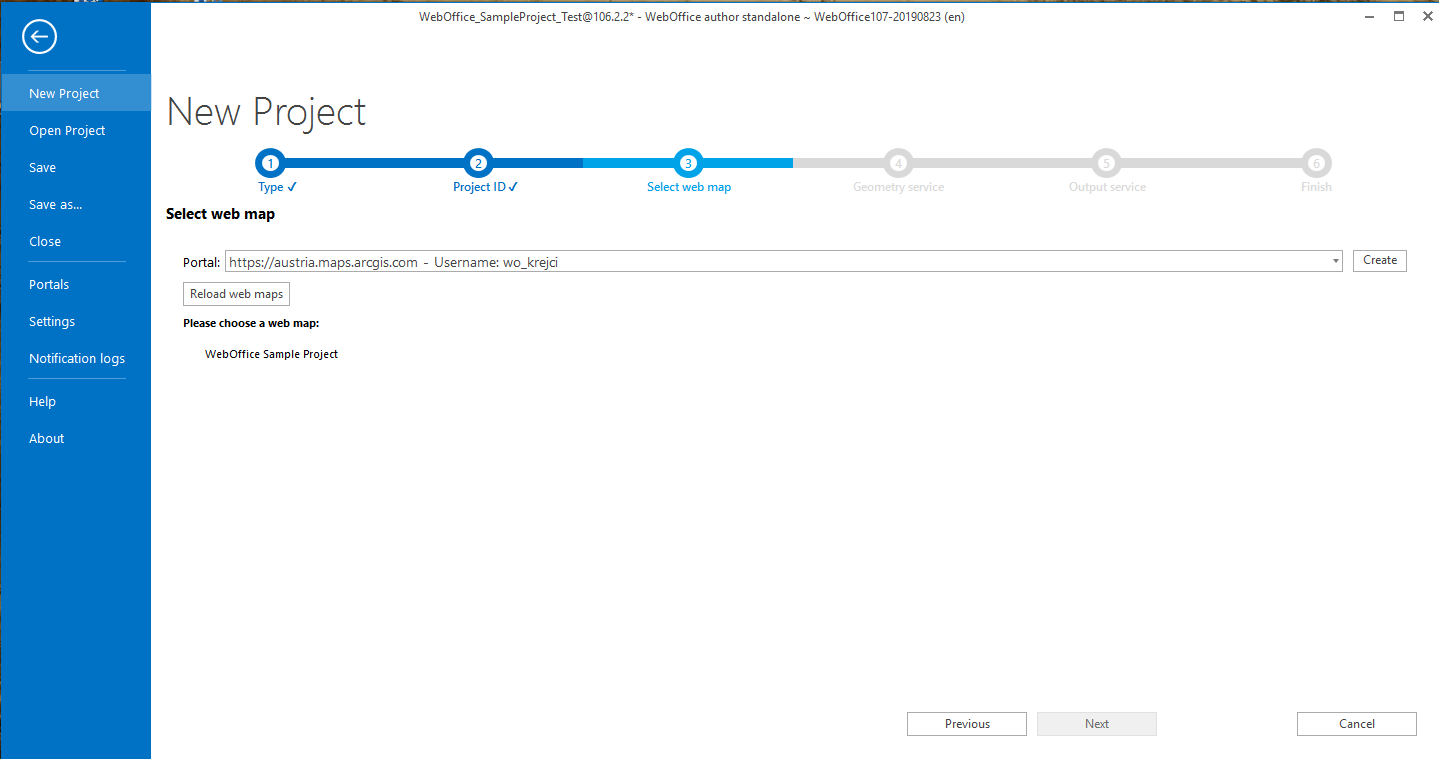
Step 3: Select web map
Select a portal connection (or create a new connection) and select the desired web map of this connection to be converted into a WebOffice project.
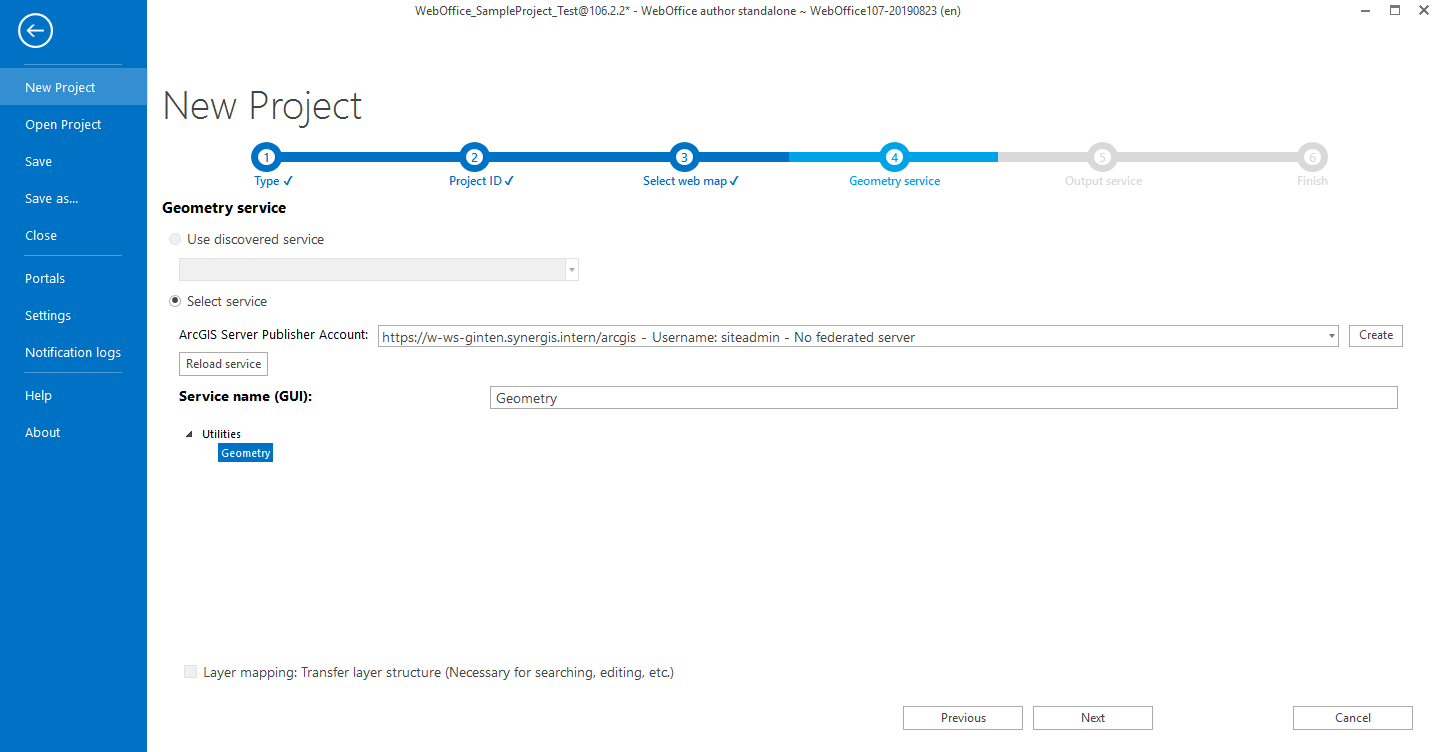
Step 4: Geometry service
This step adds a geometry service to the WebOffice 10.7 SP1 project configuration. The Geometry service is created by default in the Utilities directory when ArcGIS Server is installed. However, this service is initially stopped. You can either start this service directly on the ArcGIS Server or in the ArcCatalog. First select the server on which the Geometry service is located and insert the missing part of the REST URL of the Geometry map service. This is: "Utilities/Geometry/GeometryServer". The default value of the Geometry service is already entered.
Hinweis: Mehr Informationen zum Geometrie-Dienst in der ArcGIS Hilfe.
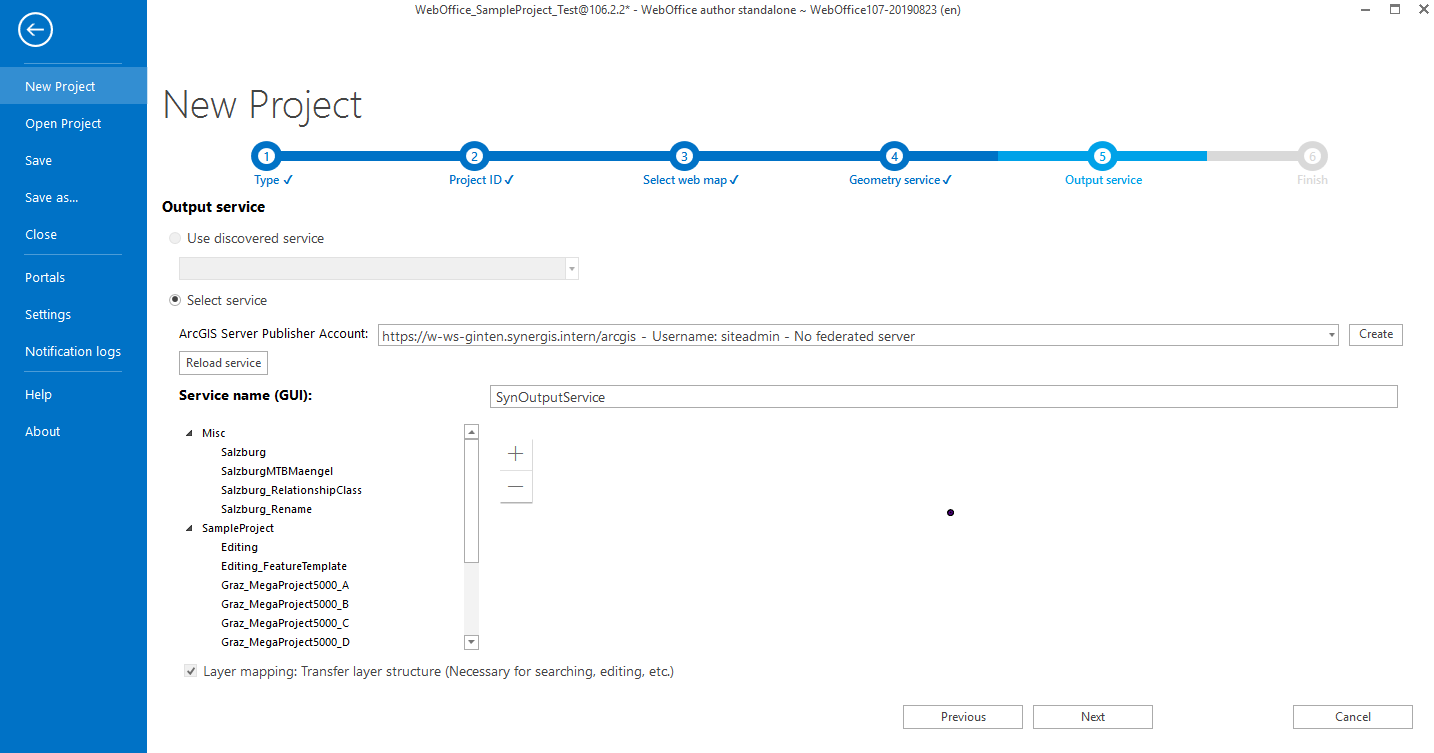
Step 5: Output service
The URL to the Output Service can also be found using your ArcGIS Server Manager. The default path of the Output Service is also already used in the project wizard.
Note: Don't forget to check, if your Output Service has been started. More information on Publishing the SynOutputService.
Schritt 6: Finish
WebOffice author standalone shows a summary of the project that will be created.
Click Finish in order to save the project configuration.