Publish the SynOutputService automatically |
  
|
Publish the SynOutputService automatically |
|
In order to automatically publish the SynOutputService, follow the steps in the described way:
•Copy the SynOutputService files from the WebOffice10.5-DVD to your system
•Check the access right on the data
•Execute the script
•Check the successfully published Service
Tip:
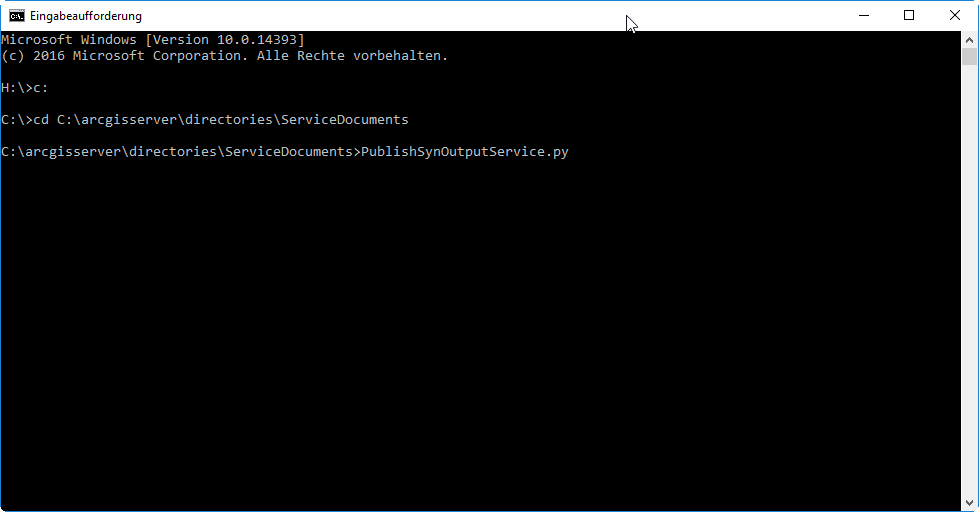
The script can be found here: WebOffice10.5-DVD\Software\Miscellaneous\Automatization\PublishSynOutputService.py
Copy the SynOutputService files from the WebOffice10.5-DVD to your system
Copy the content from WebOffice10.5-DVD\Software\WebOffice directories\ServiceDocuments to your ServiceDocuments directory (e.g. C:\arcgisserver\directories\ServiceDocuments).

Extract the SynOutputService.zip
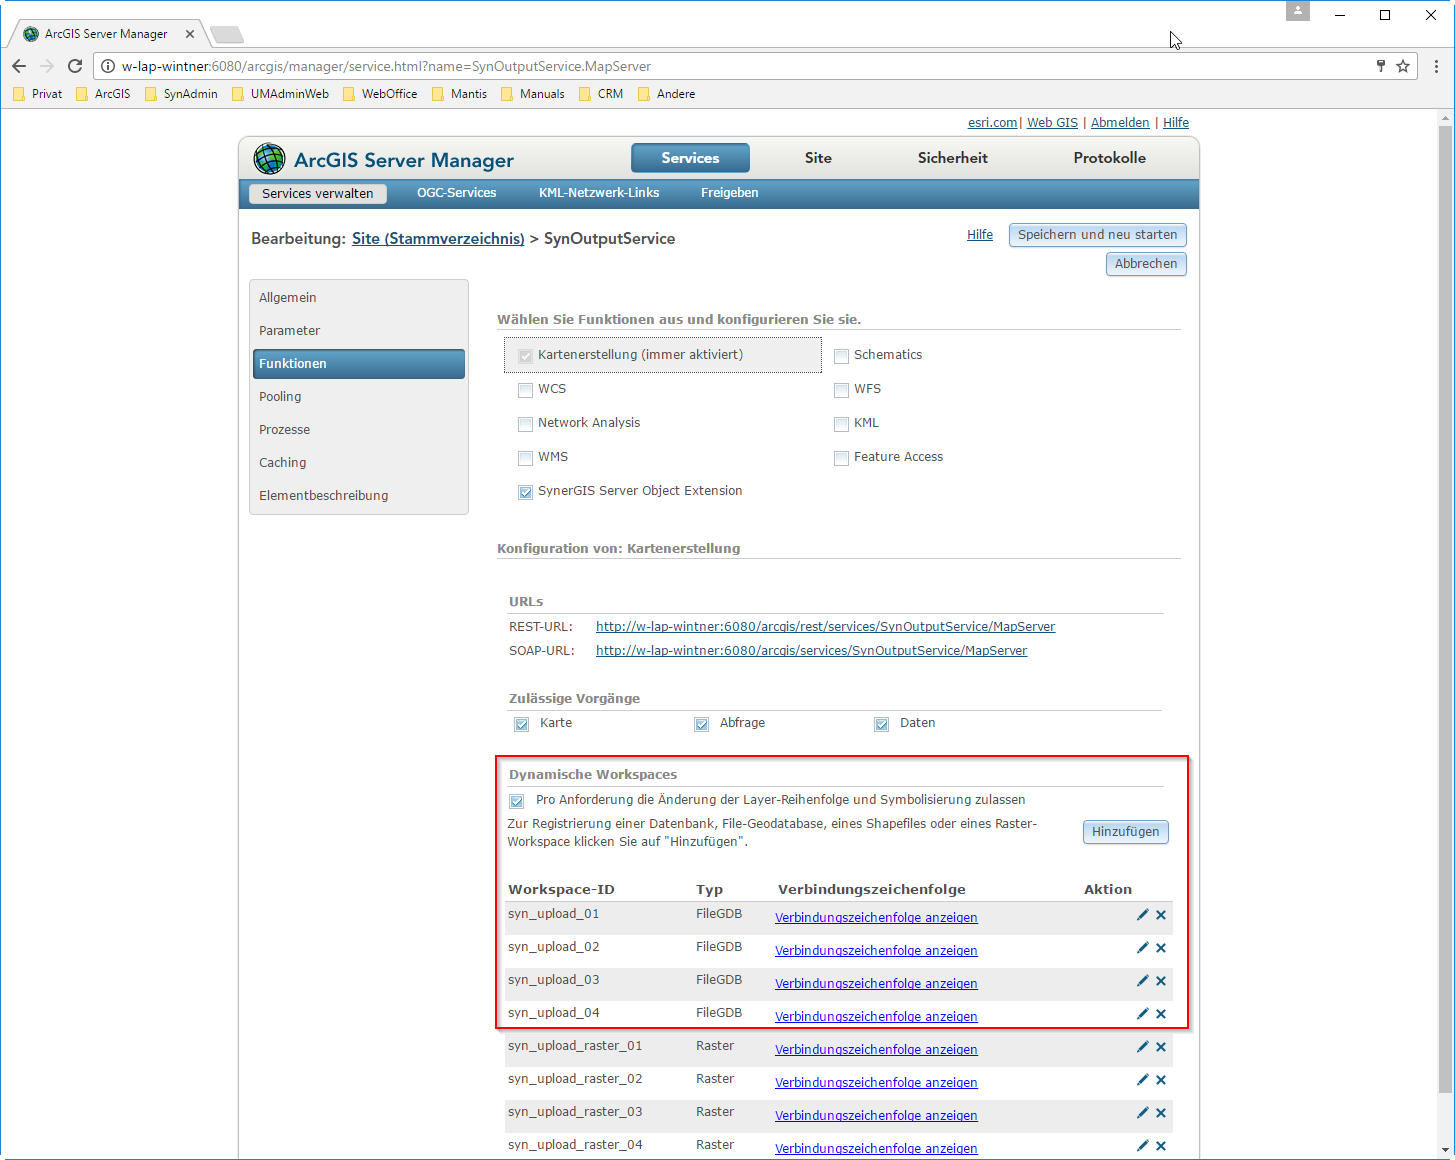
It contains the SynOutputService.mxd and a folder SynOutputService with eight file geodatabases and another folder:
•syn_markup_01.gdb
•syn_markup_02.gdb
•syn_markup_03.gdb
•syn_markup_04.gdb
•syn_upload_01.gdb
•syn_upload_02.gdb
•syn_upload_03.gdb
•syn_upload_04.gdb
•syn_upload_raster_01 (! new with WebOffice 10.4 SP2 !)
•syn_upload_raster_02 (! new with WebOffice 10.4 SP2 !)
•syn_upload_raster_03 (! new with WebOffice 10.4 SP2 !)
•syn_upload_raster_04 (! new with WebOffice 10.4 SP2 !)
•syn_upload_raster_01.gdb (! new with WebOffice 10.4 SP2 !)
•syn_upload_raster_02.gdb (! new with WebOffice 10.4 SP2 !)
•syn_upload_raster_03.gdb (! new with WebOffice 10.4 SP2 !)
•syn_upload_raster_04.gdb (! new with WebOffice 10.4 SP2 !)
Recommendation: Use the markup feature classes in the SynOutputService directly from an eGDB (SDE). For demo and test purposes it is recommended to leave the markup feature classes of the SynOutputService in the fGDB and for productive use, i. e. as soon as there is a load on the server, to always move them into an SDE database.
See more details in Put Markup Feature Classes into SDE.
Note: Make sure that the user that runs ArcGIS Server has full rights for all syn_markup geodatabases. Otherwise there might be problems with displaying selections in WebOffice map widget or measure drawings won't be visible when printing the maps.
Note: Make also sure, that the attribute read-only of the folder SynOutputService (including subfolders) is NOT checked.
Note: Be sure that the user that runs ArcGIS Server has full rights for the file geodatabases! Otherwise, the Upload Local Geodata tool will not be available.

SynOutputService file structure

SynOutputService - Security settings for gdb
Execute the script
Start the command line and browse to the path, where the file PublishSynOutputService.py is located. Then, execute the script by entering the file name.
Follow the instructions of the script. There are some mandatory inputs:
1.Use default path to arcgisserver directory (C:\arcgisserver)? Enter Y/N
Confirm with "y" if your arcgisserver directory is located in C:\arcgisserver. In case you enter "n", you will need to enter the path manually, e.g. D:\\arcgisserver
2.Enter user name to access service:
Enter an ArcGIS Server user with administrator privileges, e.g. siteadmin
3.Enter password:
4.Enter Server name: (e.g. serverhost.domain.com)
Enter the full server name, e.g. myserver.synergis.intern
5.Enter Server port: (6080 or 6443)
If your ArcGIS Server is configured without SSL, enter Port 6080 (http), otherwise 6443 (https)
6.Enter name of service:
Enter the name of the service, usually it should be named SynOutputService
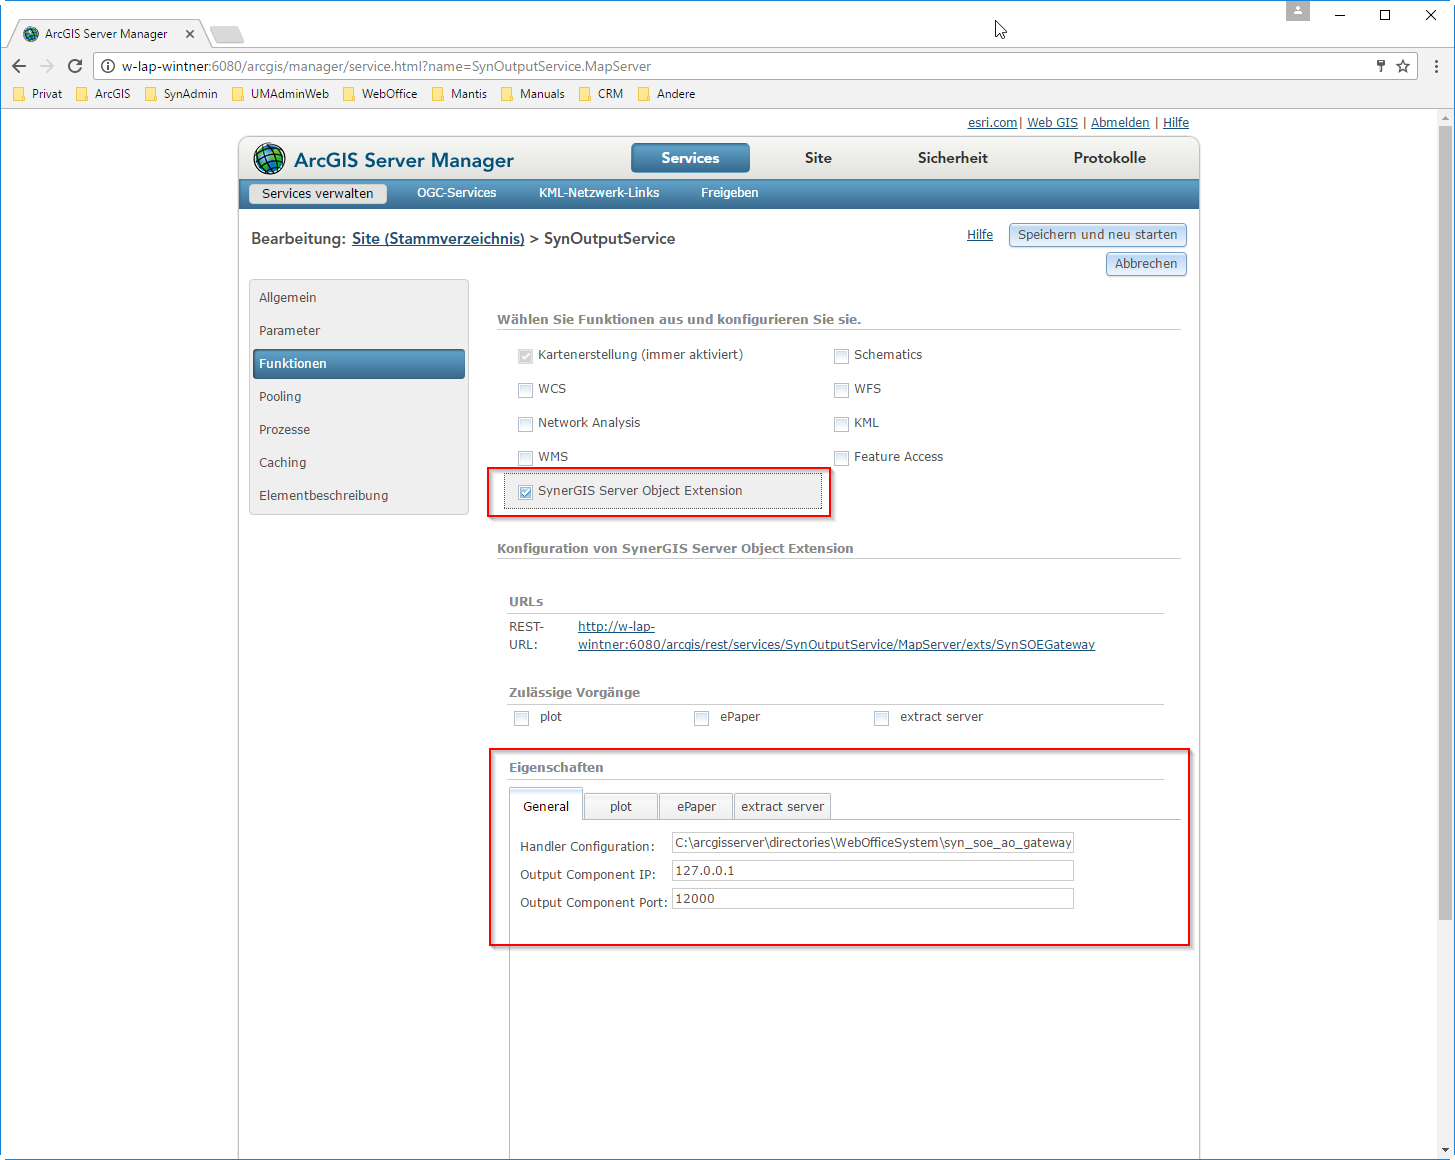
7.In the next step, the service will be published and the analyze results will be shown. After successful publishing, service properties will be updated (activating the Server Object Extension, adding of dynamic workspaces), with the minimum/maximum instances to be defined manually.
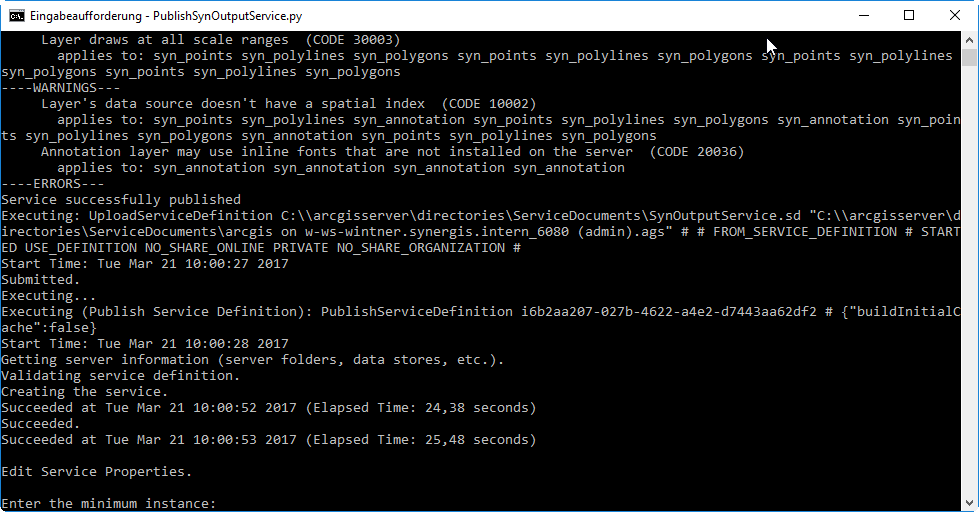
8.Enter the minimum instance:
9.Enter the maximum instance:
10.Service edited successfully
The script was successful
Check the successfully published service
Open ArcGIS Manager by entering http://<server name>[:<port>]/arcgis/manager/ (e.g. http://myserver:6080/arcgis/manager) into your browser and log-in with the primary site administrator name and password that was set during the site creation process. Check, whether all properties of the SynOutputService have been configured correctly.
Check specifically the dynamic workspaces and the activated Server Object Extension